Seven Second Version:
We didn’t have instructions—just zip ties, paracord, and a whole lot of tenacity. The roof tried to fly away, the wind tried to win, but we kept tying knots. Because in the end, tenacity doesn’t mean getting it right the first time—it means not walking away when you don’t.
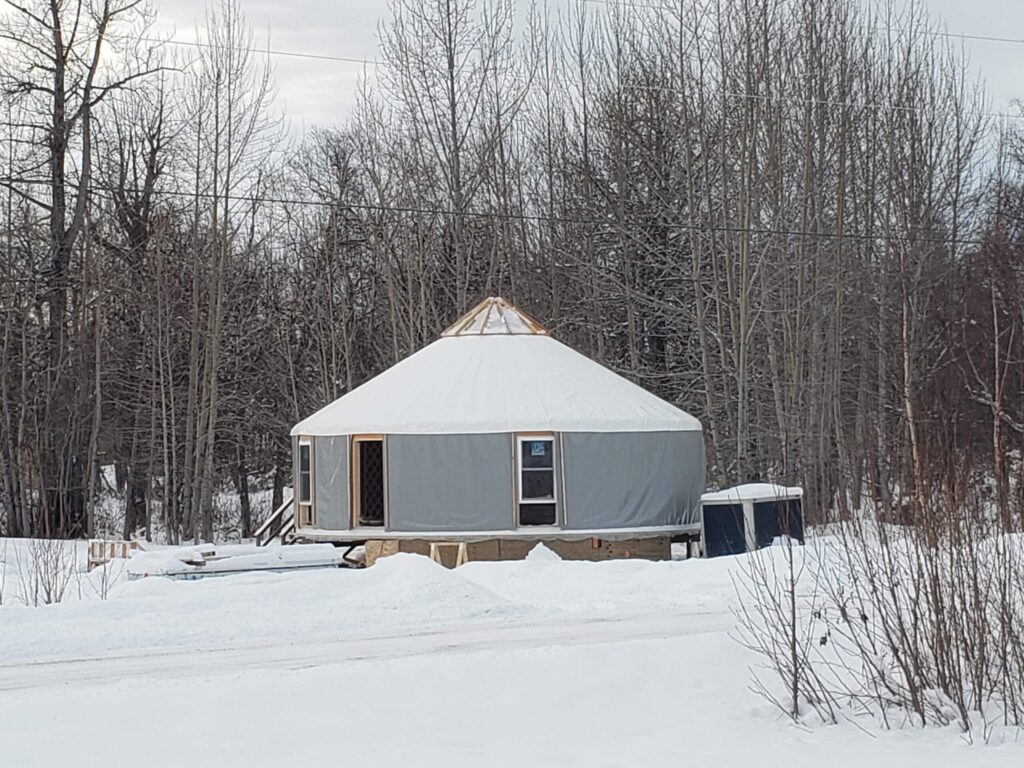
We were knee-deep in our DIY yurt build in Alaska—the kind of project that sounds like a dream until you realize the roof weighs about as much as a moose and the instructions might as well have been delivered by riddle.

We had the vinyl wall material. We had some brave helpers. What we didn’t have? Directions that made sense to someone without a degree in ancient linguistics.
When I called the yurt manufacturer to ask how to install the wall cover, the answer I got sounded like it had been translated from ancient Sumerian to Portuguese and then back into English—twice.
“You’ll want to start by zip-tying the wall package with the hardware included in the material package. Running stitch the sidewalls so it ties together. The base should be mechanically fastened—perimeter-wise—to the drip ring using the grommets.”
No mention of how to secure the top of anything. Just… “running stitch so it ties together.” Ties together how? With what? To what? And what exactly is the drip ring? I knew what a drip edge was because I had to “make sure I installed the drip edge” —but was this the same thing? Something different? Something invented mid-sentence?
I’m sure it was crystal clear to someone fluent in yurt-ese, but for me, it felt like solving a riddle scribbled by a tent-building philosopher who hated follow-up questions.
So I made the decision and took an educated-ish guess.
DIY Yurt Wall Installation: Layers, Zip Ties, and a Little NASA Vibes
Day one was just me, my father-in-law, and my brother-in-law. We tackled the walls first. I honestly don’t have much in the way of pictures of this part of the process because it was confusing enough already without trying to document things along the way.
Here’s how the yurt wall material broke down:
- Interior canvas layer
- Reflectix (NASA-grade bubble wrap foil the use in space shuttles)
- 1-inch polyester insulation fill
- Another layer of Reflectix
- House wrap
All sewn together into one multi-layered panel. Then there was a separate outer layer of duro-last vinyl that was supposed to go on the outside of that as the main weather shell. I installed that first because the yurt manufacture “like(d) to put up the exterior and slide the insulation in after the fact.”
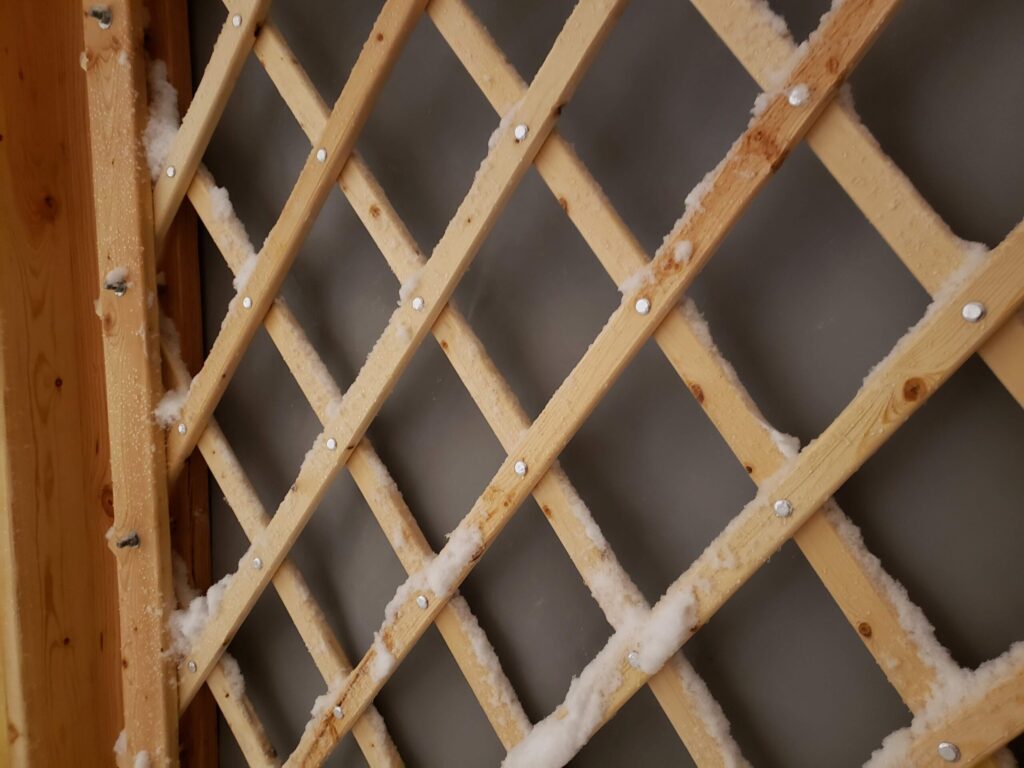
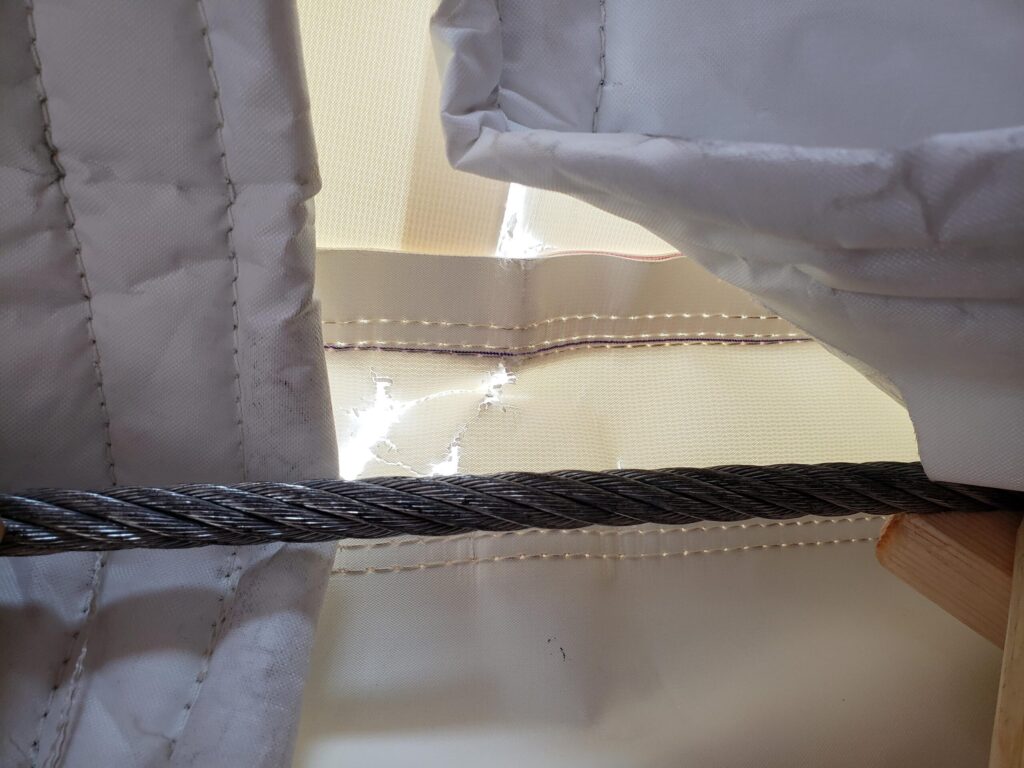
We zip-tied the package to the ½” steel cable that runs around the top of the lattice, which—lucky for me—turned out to be correct.
At the base, I used some big-headed screws from a mysterious box labeled “hardware.” I later discovered these were exterior truss head screws—just the thing I needed… and now can’t seem to find anywhere, of course, because I could really use a few extra.
Building the Roof on a Yurt: Pizza Wedges, Ice, and Monkey Moves
The next day, we added another friend to the crew—a great guy who’d volunteered to help. A real trooper. A poor sucker. He climbed around on the rafters like a monkey in the jungle… if the jungle were made of icy lumber and a fall risk.
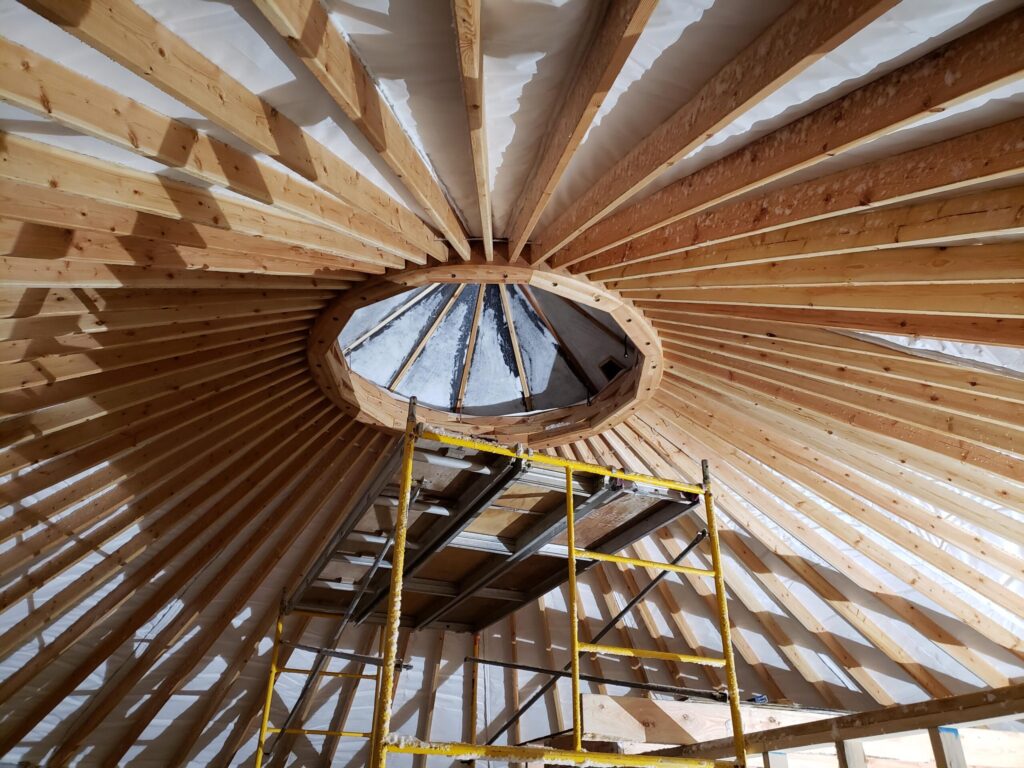
The interior roof insulation came in giant pizza-slice-shaped panels that velcroed together and stretched between the center ring and the walls. The narrow ends were screwed into the center ring, and the wider ends were meant to be held down by the roof/wall connection (whatever that was supposed to be).
Then came the outer vinyl yurt roof cover.
It was one massive piece—about 34 feet in diameter with an 8-foot hole in the middle for the center ring. Lifting it 15 feet in the air was like trying to raise a wet, frozen pool cover with no handles. In winter. In Alaska.
At one point, I had half of it balanced on my head while someone scrambled across the rafters trying to pull the rest through.
Then came the top part. A big plexi-glass skylight with a steel ring in the middle to secure the wood stove stack into. We roped it up and hauled it up into the roof like we were building the ancient pyramids.
Would I do it again?
Yes.
Would I do it like that again?
Absolutely not. Months later, I found out the yurt maker normally uses a boom lift for the top cover because it is “too heavy to do by hand” and to get that skylight up.
How Not to Stitch a Yurt Roof (But Kinda Make It Work Anyway)
Once the roof was up, we zip-tied the wall-to-roof connections wherever we could find grommets—wedged under stiff vinyl flaps clearly not designed for human hands, let alone gloved ones. Then came the fabled “running stitch.”
Let’s just say I will not be changing careers to become a tailor.
But somehow, it all came together. The insulation was in. The vinyl yurt cover was on. The seams were (sort of) sealed. We were sore, frozen, and exhausted—but the yurt was wrapped up.
Kind of.
Alaska Reminds Us Who’s In Charge: Windstorm Hits the Yurt Build
Before I could call the yurt company the next morning to ask what exactly I was missing about this “running stitch” situation—and how the roof and walls were actually supposed to be zip-tied… or not zip-tied together—Alaska decided to test our work.
Remember in How Not To Choose a Yurt Location where I mentioned my fantastic-ly terrible location and placement. That sure did come back to bite me.
My phone rang at 8:00 AM.
My father-in-law:
“Uh… the roof of the yurt is sort of getting blown off.”
I sped over (safely, of course) from our rental. I came around the final bend in the road and head long into a gust of frigid wind coming down the valley right off a glacier. It was that moment when I saw it: the back half of the roof waving to me in the wind like a toddler saying,
“Hi Dad! Look at what I can do!”
Thwack. Flap. Flap. THWACK.
That vinyl yurt roof was durable—but not designed to sand itself down on exposed rafters during a full-blown windstorm. My brand-new roof was now holey. Not holy. Just… full of holes. I could fill a post with the pictures but I won’t waste your time or re-live my pain.
Emergency Roof Rescue: Frostnip and Frankenstein Fixes
The temperature? A balmy 5°F.
Sustained winds? 25–30 mph.
Wind gusts? Over 75 mph.
Wind chill? Not ideal.
I cut up a bundle of 550 paracord from my car and, with my father-in-law and brother-in-law, began lashing the yurt roof down like cold, frostbitten pirates trying to “batten down the hatches” to save their ship in a hurricane.
I couldn’t tie knots with gloves on, so I went barehanded. That earned me frostnip that still flares up when the temps drop. Thankfully it wasn’t full blow frostbite.
The paracord held—for a bit. Then it started snapping. Not the knots—the cord itself. We scrambled, adapted, and used a Frankenstein combo of zip ties, paracord, more paracord, and—just to be safe—even more zip ties. Every single grommet got used.
No walls got framed that day.
No pictures got taken.
But we saved the roof.
Yurt Building Lesson: Tenacity Over Technique
We didn’t do it right the first time. Honestly, we barely knew what we were doing at all. But we didn’t walk away. We showed up in the cold, in the wind, and in the mess—and we held that roof down with paracord and prayer and a healthy dose of tenacity. Tenacity doesn’t mean getting it right the first time—it means not walking away when you don’t
Because in the face of failure, tenacity ties the next knot and keeps going.
Building anything in Alaska is a constant race and occasional battle against Mother Nature who simultaneously tries to kill you while looking dazzlingly beautiful. It either makes us resilient or breaks us. I’m glad you took the resiliency route.
Pingback: DIY Yurt Mistakes in Alaska, Budget Trade-Offs, and a Lesson in Humility - Yurtstead Alaska